
Main Window #
After launching ActionNodes you will see the plugin’s main window. We can divide it into three main parts:
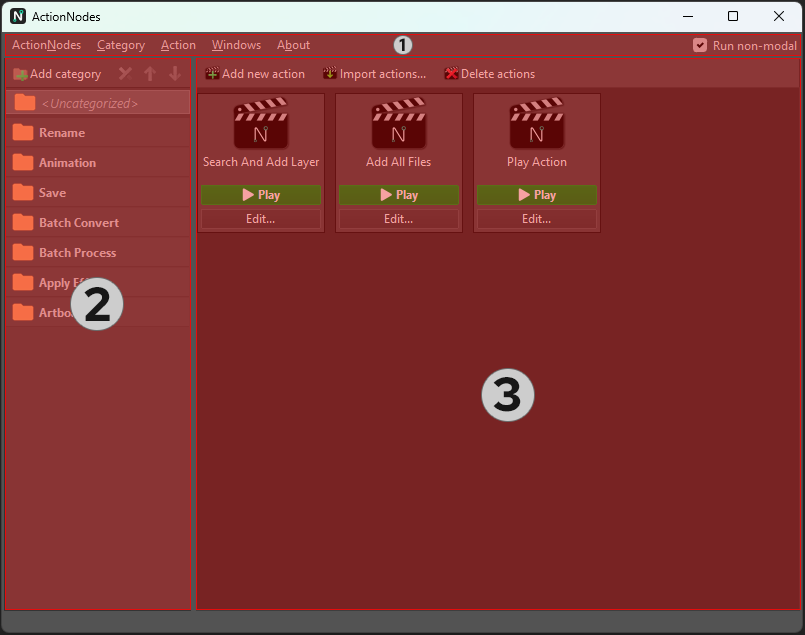
- Main Menu. The main menu of the plugin is located in this area. From this menu, you can manage both categories and actions. You can also activate the plugin from this menu.
- Categories Area. In this area, you can manage the category structure. You can add new categories, delete unnecessary categories, rename them, and change their order. Categories are useful for conveniently structuring your actions.
- Actions Area. In this area, you can see a list of all the actions contained in the current category. Here you can create new actions, add existing ones (saved in a file on the disk), delete unnecessary ones, reorder them by dragging and dropping, or move them to other categories.
Main Menu #
The main menu of ActionNodes provides access to the main features and settings. Here’s a brief description of each menu item:
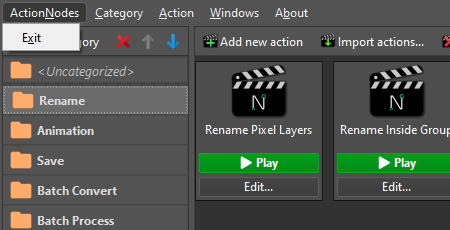
- ActionNodes. This menu item provides access to the only submenu item, which is “Exit”.
| Exit | Use this option to close the plugin window and exit the plugin. |
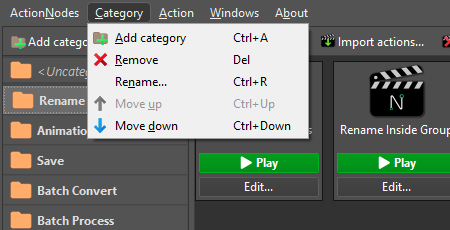
- Category. This menu item provides access to submenu items that allow you to manage action categories. Here are the available submenu items:
| Add category | Adds a new category to the end of the categories list. |
| Remove | Deletes the currently selected category. This command applies only to the current category, so all actions contained in this category will not be deleted, but will be moved to the <Uncategorized> category. |
| Rename… | Renames the current category. |
| Move up | Move the current category up the list. (Note: you can’t move a category above the special category <Uncategorized>). |
| Move down | Moves the current category down the list. |
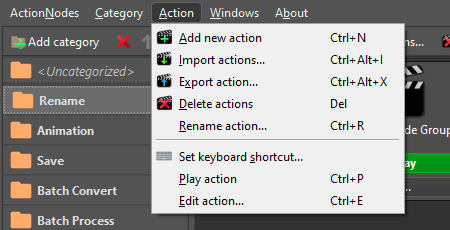
- Action. This menu item provides access to submenu items that allow you to manage actions within the current category. Here are the available submenu items:
| Add new action | Creates a new action and immediately opens the editor to edit it using nodes. |
| Import actions… | Opens the File Selection dialog box to search for and import an existing file with a saved action in it. When the file is successfully selected, the action is added to the current category. |
| Export action… | Exports the current action to a file of the specified format (binary or text). If the selected action uses library nodes, you can also embed these nodes inside the action by converting them to custom nodes. |
| Delete actions | Deletes all selected actions in the current category. Actions will be deleted only from the list in the plugin, and the files with these actions will remain on disk. |
| Rename action… | Opens a dialog box for renaming the currently selected action. Note: only the label inside the file will be renamed and the name of the action will be displayed in the plug-in accordingly, the name of the file itself on the disk will not be changed. |
| Set keyboard shortcut… | Allows you to assign a keyboard shortcut to launch the selected action. |
| Play action | Runs the currently selected action. |
| Edit action… | Opens the editor for editing the currently selected action. |
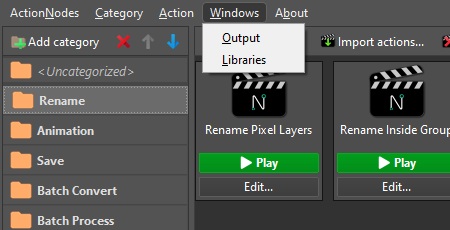
- Windows. This menu item provides access to a submenu that controls the display of additional plugin windows. The following items are available in this submenu:
| Output | Displays/hides the window where helpful information is printed during the work of an action. |
| Libraries | Displays/hides the window where you can manage libraries and library nodes. |
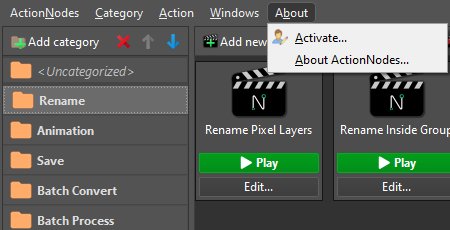
- About. This menu item provides access to a submenu, where you can find commands that give you information about the plugin and allow you to register ActionNodes if needed. Here are the available submenu items:
| Activate… | Opens a dialog box where you can activate the plugin. |
| About ActionNodes… | Opens a dialog box with information about the current version of the plugin. |
On the right side of the menu, there is a checkbox that switches the plugin’s mode of operation: modal and non-modal.
To activate a particular mode, you need to restart Photoshop after changing this setting. In the demo mode (when the plugin is not activated), ActionNodes can only work in modal mode.
In modal mode, the plugin blocks any input to Photoshop. In non-modal mode, ActionNodes works in parallel with Photoshop and does not block its input.
Categories Area #
Here you can manage the category structure that is used to organize and structure your actions. Categories can be thought of as labels or tags that you can assign to your actions based on their shared characteristics or goals. By using categories, you can group similar actions, making it easier to find and work with related tasks.
You can add new categories, delete unnecessary categories, rename existing categories, and change their order. You can create as many categories as you need to properly organize your actions. However, it’s important to note that categories cannot be nested, meaning that you cannot create subcategories within categories.
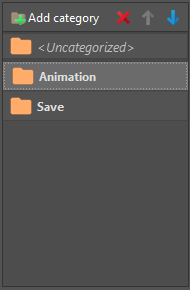
Categories Area contains the toolbar (at the top of the area) and the list of categories (below). The toolbar contains the main commands for working with categories.
In addition to the toolbar, you can access these commands from the context menu:
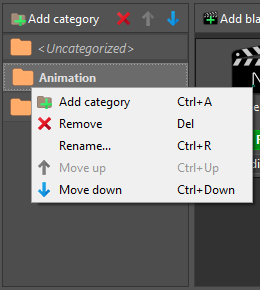
All these commands are also available from the Main Menu.
In addition to the custom categories you can create, you always have one special category called “<Uncategorized>” that cannot be moved, deleted, or renamed. All actions from the custom category you delete are moved to this special category.
Adding Сategory #
To add a new category, use the Add category command from the Categories Area context menu or the Category submenu of the Main Menu, or use the Ctrl+A hotkey for this command. You can also run this command from the toolbar of this area ![]() .
.
After executing this command, a new category named New Category appears at the end of the list of categories.
Deleting Category #
To delete a category, select the category you want to delete and use the Remove command from the category’s context menu, from the Category submenu of the Main Menu, or by using the keyboard shortcut Del (be make sure the Categories Area has a focus). You can also delete a selected category using the corresponding command on the Categories Area toolbar ![]() .
.
Renaming Category #
There are two ways to rename a category:
- The first way is to select the desired category and run the Rename… command from the Category Area context menu or the Category submenu of the Main Menu, or use the Ctrl+R keyboard shortcut to run this command (but make sure the Category Area has focus).
- The second way is to double-click on the category you want to rename, type a new name, and click outside the edit box or press Enter to apply the new name, or press Esc to cancel the rename.
Reordering Categories #
You also have two ways to change the order of categories:
- The first is to select the category you want to move and use the Move up and Move down commands from the Category Area context menu or the Category submenu of the main menu (or using the keyboard shortcuts Ctrl+Up and Ctrl+Down, respectively) to move the category to the desired location. You can also use the corresponding buttons on the Category Area control panel
 .
. - The second way is to drag the category with the mouse.
Actions Area #
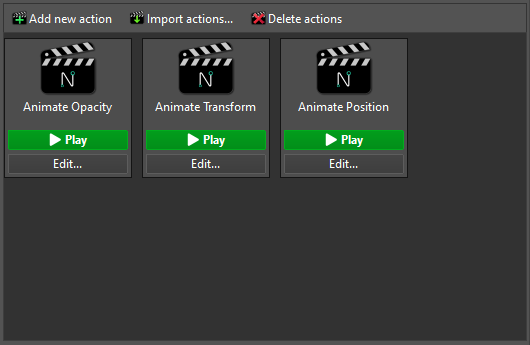
This area contains controls for managing the list of actions contained in the current category (the current category is changed by selecting the category in the Categories Area).
At the top of the Actions Area is a toolbar with basic commands. Below the toolbar is a list of actions.
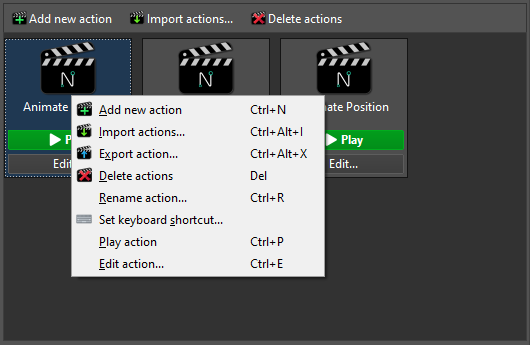
In addition to the toolbar, you can access the Actions Area commands from the context menu of actions (by right-clicking on selected actions).
You can also access these commands from the Main Menu.
Adding an Action #
To add an action, you can create a completely new one or add an existing one saved in a file.
- To create a new action and add it to the current category, you need to use the Add new action command, which can be found on the toolbar of the Actions Area, in the context menu of this area, or in the Action submenu of the Main Menu. Also, you can use the Ctrl+N keyboard shortcut to execute this command. Running this command will open an empty ActionNodes Editor.
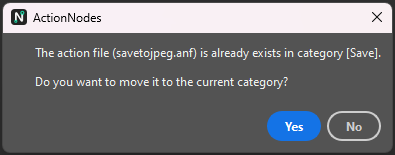
- To add an existing action, use the Import actions… command, which can be found on the toolbar of the Actions Area, in the context menu of this area, or in the Action submenu of the Main Menu. Also, you can use the Ctrl+Alt+I keyboard shortcut to execute this command. Running this command will open a standard file selection dialog to search for files with the ANF and ANC extensions – files with this extension contain saved ActionNodes actions. If after adding a file, it turns out that such a file has already been added, and if it is in the current category, then a new action (duplicate) will not be added, but if this action is in another category, the plugin will ask for permission to move it to the current category.
Export Action #
You can export the current action (marked with a dashed line) to another file and/or another format without opening the ActionNodes Editor using the Export Action… command. You can access this command from the context menu in the Actions Area or from the Action submenu of the Main Menu. Also, you can use the Ctrl+Alt+X keyboard shortcut to execute this command. When you run the command, a dialog box appears to select a file name. Here you can also specify the type of file to which the action is exported (ANF or ANC). After selecting the name and type, if the exported action uses library nodes, ActionNodes will ask you if you want to integrate these nodes into the action.

Integrating library nodes inside an action will increase the file size, but if you don’t integrate such nodes, you will also need to supply and install all the library files that the action uses to make it work on another computer.
Deleting Actions #
To delete unnecessary actions, use the Delete actions command. You can find it on the toolbar of the Actions Area, in the context menu of this area, or in the Action submenu of the Main Menu. Also, you can use Del key to delete selected actions.
This command deletes all selected actions in the current category. Keep in mind that this command only deletes actions from the list of the plugin itself and does not delete the files on the disk where these actions are saved.
Renaming Action #
To rename an Action, use the Rename action command, which can be found in the context menu of the action you want to rename or in the Action submenu of the Main Menu. You can also execute the command with the keyboard shortcut Ctrl+R.

You can also rename an action by double-clicking on it. To finish renaming, click outside the editing area or press Enter. To cancel the renaming, press the Esc key.
Setting Action Shortcut #
You can assign a different keyboard shortcut to launch for each action. To do this, select the action for which you want to set a keyboard shortcut and run the Set keyboard shortcut command from the context menu of this action or from the Action submenu of the Main Menu. In the Set Keyboard Shortcut dialog box, press the keyboard shortcut you want to set for the action and click OK.

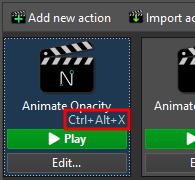
After that, the action will be associated with this keyboard shortcut. The specified keyboard shortcut also appears on the action icon.
If, when setting a keyboard shortcut, it turns out that the same keyboard shortcut is already assigned to another action, the plugin will display a warning in the Set Keyboard Shortcut dialog box.

If you decide to use an already assigned keyboard shortcut anyway, the shortcut will be deleted for the previous action and assigned for this action.
To remove a keyboard shortcut for an action, run the command Set keyboard shortcut for this action and click the icon with a red X in the keyboard shortcuts input field.
Please note that all assigned keyboard shortcuts for actions work globally and have the highest priority over all other keyboard shortcuts!
This has the advantage that you can use these keyboard shortcuts not only when the ActionNodes window is active, but also when working directly in Photoshop.
However, this also means that these keyboard shortcuts will also work in all other programs, such as Notepad. That’s why it’s important to assign keyboard shortcuts to launch actions that you don’t use anywhere else, because if you assign to an action a keyboard shortcut, such as Ctrl+Z, which is usually responsible for undoing operations, that shortcut will no longer work in any program (neither Photoshop, nor Notepad, nor any other), but will only launch the assigned action. At least until you close ActionNodes or remove the keyboard shortcut from the action.
Launching Action #
To launch an action, you can use one of three methods:
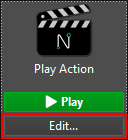
- Click the green Play button on the action itself.

- Select the action and run the Play action command from its context menu or from the Action submenu of the Main Menu (or by using the Ctrl+P hotkey for this command).
- If you’ve set a keyboard shortcut for the action, use it to launch it.
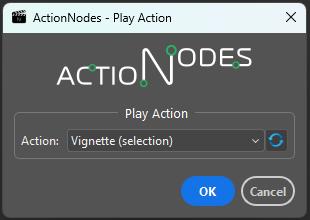
After launching an action, if it has parameters, the standard interface of the action dialog box is displayed, where you can enter the values of these parameters.
Editing Action #
There are two ways to edit an action:
- Click the Edit button on the action’s icon.
- Select the required action and run the Edit action… command from its context menu or the Action submenu of the Main Menu, or press Ctrl+E.
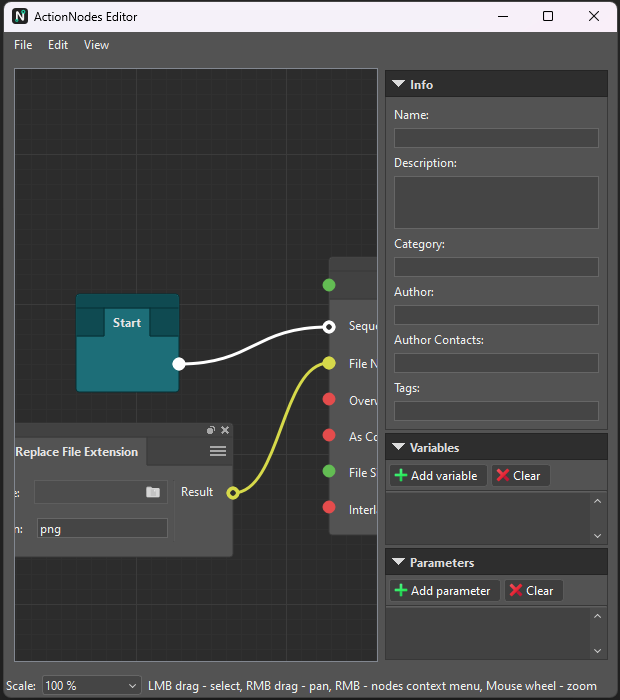
After that, you will see the ActionNodes Editor window.
Reordering Actions #
You can reorder actions by dragging and dropping them.
Changing the Action category #
You can use drag and drop not only to change the order of actions but also to change the category to which actions belong.


